Homemade Beef Broth: Your Gateway to Unrivaled Flavor & Nutrition
There's a quiet revolution happening in kitchens across the globe, a return to the foundational elements of wholesome cooking. At the heart of this movement lies homemade beef broth – a rich, savory elixir that elevates dishes, nourishes the body, and offers a remarkable alternative to store-bought, often additive-laden options. Learning how to make beef broth stock might seem daunting at first, a task relegated to culinary experts, but the truth is, it's surprisingly simple, incredibly rewarding, and an essential skill for anyone embracing real food. Forget the overly complicated recipes; this guide will show you how to craft a truly exceptional broth with ease, unlocking maximum flavor and a powerhouse of nutrients.
For centuries, broth has been a staple in cuisines worldwide, revered not just for its comforting warmth and depth of taste, but also for its profound health benefits. From aiding digestion to supporting joint health and boosting immunity, a good beef broth is more than just a cooking liquid; it's a therapeutic tonic. Moreover, by mastering how to make beef broth stock at home, you gain control over ingredients, ensure quality, and save money – making it a win-win for your pantry and your well-being.
Choosing Your Bones: The Foundation of Flavor & Nutrition
The journey to an incredible beef broth begins with selecting the right bones. While any beef bones will contribute valuable minerals and flavor, understanding the different types and their contributions will allow you to craft a broth that’s truly superior. For the ultimate in flavor, gelatin, and nutrient density, aim for a diverse mix.
*
Meaty Bones: These are crucial for that deep, rich beefy flavor we all love. Bones like beef shanks, oxtail, or short ribs still have some meat and connective tissue attached, which caramelizes beautifully during roasting, contributing significantly to the broth's hearty taste.
*
Marrow Bones: Often marketed as "soup bones" by butchers, these are typically femur or humerus bones, cut crosswise to expose the marrow. Marrow adds a creamy richness and a distinct umami depth to your broth. It's also packed with beneficial fats and stem cells.
*
Gelatinous Bones: This is where the magic happens for joint support! Knuckles, hooves, feet, and even a skull provide an abundance of collagen, which breaks down into gelatin during the long simmer. Gelatin-rich broth is not only incredibly nourishing for your own joints (providing glucosamine and chondroitin) but also gives your finished broth that coveted jelly-like consistency when chilled.
While a blend of all three types will yield the most nutrient-dense and flavorful broth, don't fret if you can't get your hands on every single kind. Even a basic assortment of bones will still provide a wealth of healthful minerals like calcium, magnesium, phosphorus, and potassium, which are essential for various bodily functions. The key is simply to start with good quality bones, preferably from grass-fed, pasture-raised animals if possible, to ensure the highest nutritional profile.
The Roasting & Simmering Process: Unlocking Deep Flavors
Once you have your bones, the next crucial step in learning how to make beef broth stock is the initial preparation and the all-important simmer. This process is where the flavors truly develop and meld.
Roasting for Richness
For a deep, complex flavor and a beautiful amber color, *roasting your meaty bones beforehand is highly recommended*. This step initiates the Maillard reaction – a chemical process that creates hundreds of new flavor compounds, transforming mild beef notes into something profoundly savory and irresistible.
1. **Preheat Oven:** Set your oven to 350°F (175°C).
2. **Arrange Bones:** Place your meaty bones (and marrow bones, if you wish to roast them) in a single layer in a large roasting pan.
3. **Roast:** Roast for 30-60 minutes, or until the bones are deeply browned. Keep an eye on them to prevent burning.
* *Tip:* If you're using bones from a roast you've already cooked (like a beef shoulder roast), you can often skip this step, as those bones have already undergone the flavor-inducing Maillard reaction.
Setting Up for the Simmer
After roasting, transfer all your bones – roasted and unroasted (like knuckles or feet) – to your largest stockpot.
1. **Cover with Water:** Cover the bones generously with cold water. Aim for at least an inch or two above the bones. Starting with cold water helps to slowly extract impurities and minerals from the bones.
2. **Add Acid:** Introduce a couple of tablespoons of apple cider vinegar or lemon juice. This isn't just for subtle flavor; the acidity helps to draw out essential minerals from the bones, enhancing the nutritional value of your broth. Don't worry, the finished broth won't taste sour!
3. **Bring to a Boil, Then Simmer:** Place the pot on the stovetop and bring it to a rolling boil over high heat. As soon as it boils, reduce the heat immediately to maintain a gentle simmer. You should see just a few small bubbles breaking the surface, not a vigorous boil.
4. **Skim the Scum:** As the broth heats and begins to simmer, impurities will rise to the surface in the form of a grayish foam or "scum." Gently skim this off with a ladle or spoon and discard it. This step is important for producing a clearer, better-tasting broth. You might need to do this a few times during the first hour or so of simmering.
This initial preparation sets the stage for the long, slow cook that truly defines how to make beef broth stock that's both flavorful and incredibly nourishing. For a deeper dive into these initial steps and the importance of the long simmer, consider exploring articles like
Perfect Beef Broth: Best Bones, Roasting, and 24-Hour Simmer.
Essential Additions & The Long Simmer: Maximizing Your Broth
The true essence of a magnificent beef broth is extracted during its prolonged simmer. This is where patience is key, allowing the water to slowly coax out all the wonderful goodness from the bones.
Aromatics and Seasoning (Optional but Recommended)
While the bones are the stars, adding some simple aromatics a few hours before the broth is done can enhance the complexity of its flavor.
*
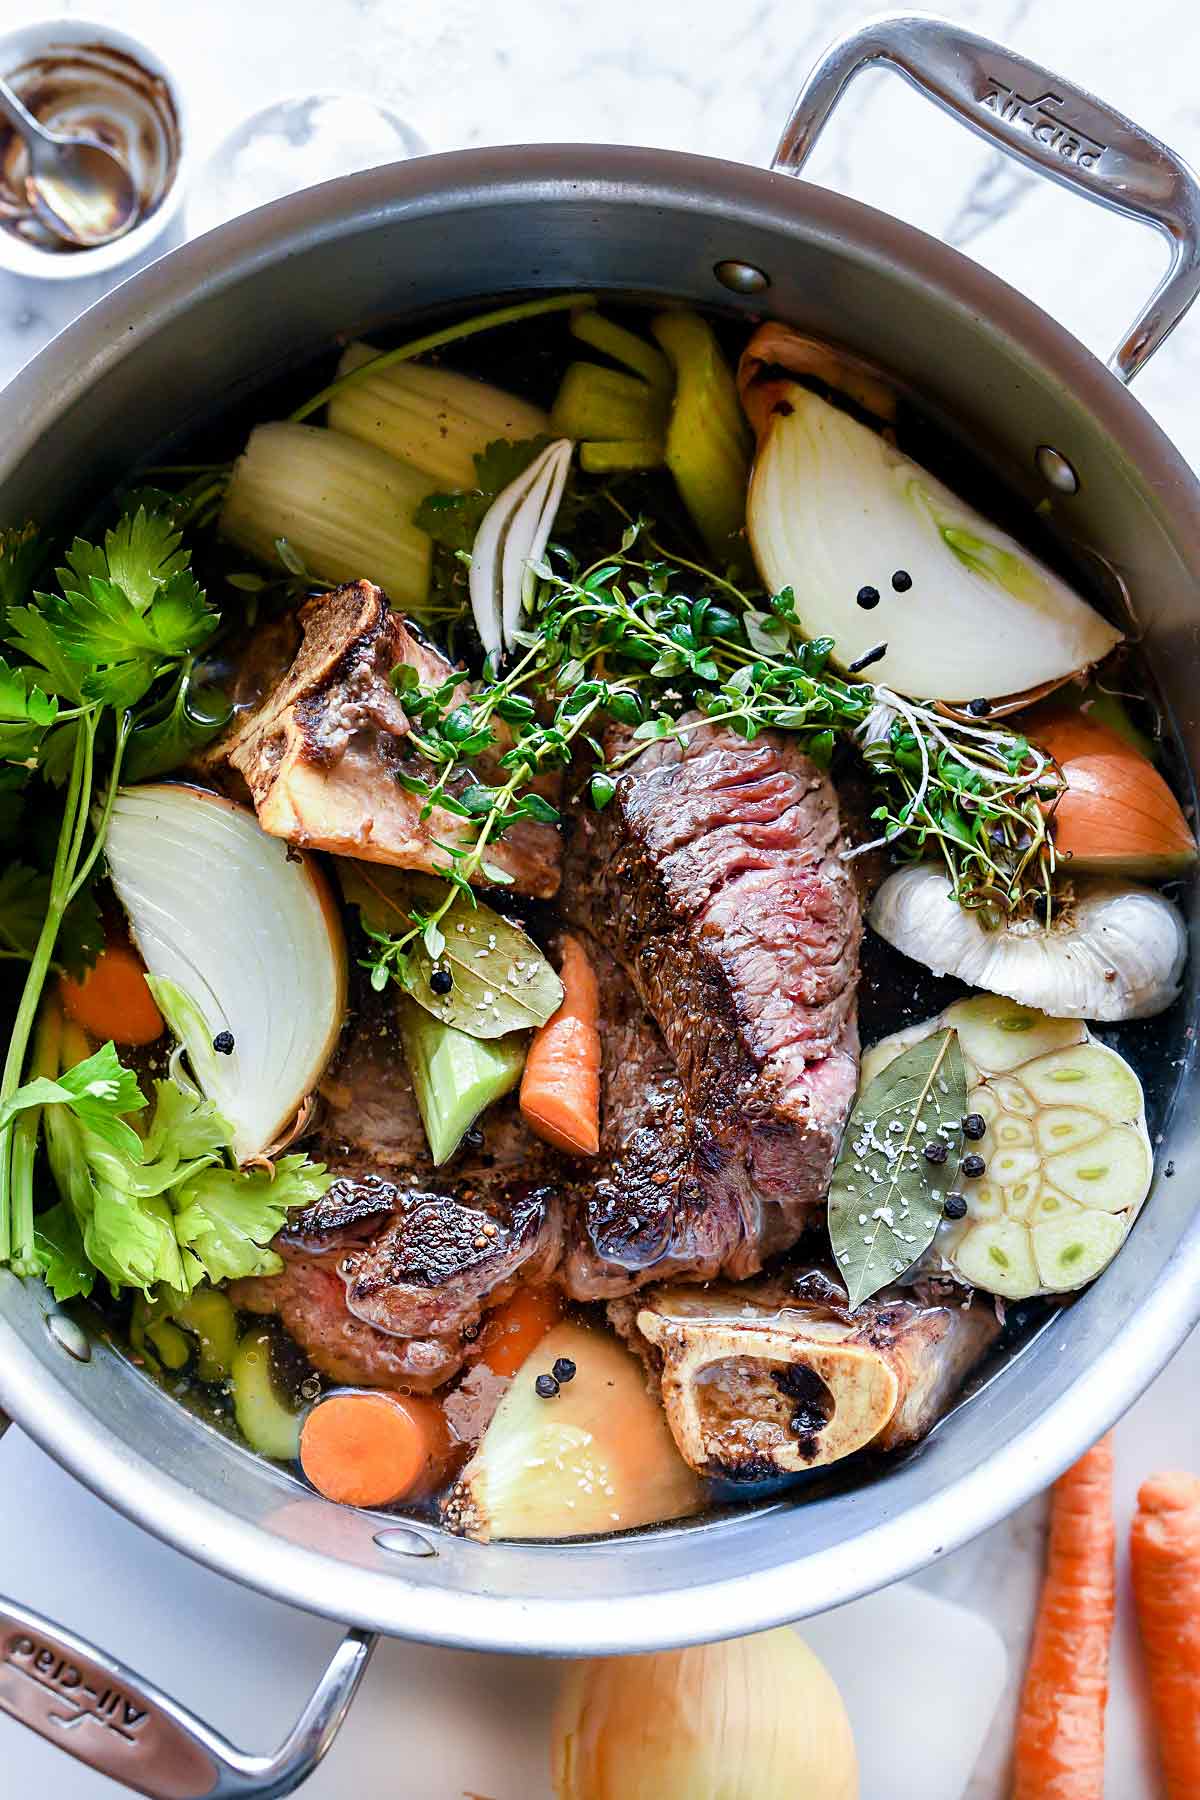
Vegetable Scraps: This is a perfect way to use up vegetable odds and ends! Onion skins, carrot peels, celery ends, or even a wilting herb bunch can be tossed in. Avoid anything too strong-flavored like broccoli or cabbage, as they can overpower the delicate beef notes.
*
Fresh Vegetables: If you don't have scraps, a halved onion, a few carrots, and a couple of celery stalks are classic additions.
*
Herbs & Spices: A bay leaf, a few peppercorns, and sprigs of parsley or thyme can also be added.
*
When to Add: It’s best to add vegetables and herbs during the *last few hours* of simmering. Adding them too early can result in an overcooked, sometimes bitter, flavor profile.
*
Salt: Season with salt only towards the very end of the cooking process. As the broth reduces slightly, the salt concentration can increase, so it's always better to adjust seasoning at the end to prevent over-salting.
The Long, Gentle Simmer
This is perhaps the most critical step in learning how to make beef broth stock. For beef, you want to aim for a minimum of 24 hours, and some enthusiasts even go for 48 hours!
*
Why So Long? The longer simmer time is essential for large animal bones like a cow's. It allows for the maximum extraction of minerals, collagen, and other beneficial compounds that contribute to the broth's nutritional power and gelatinous texture.
*
Maintaining the Simmer: Keep the heat on low, just enough to maintain a very gentle simmer. Avoid a rolling boil, as this can emulsify fats, leading to a cloudy broth, and can also break down the collagen too quickly.
*
Adding Water: As the broth simmers, water will naturally evaporate. Add more water as needed to keep the bones covered, ensuring continuous extraction.
Storage & Creative Uses for Your Homemade Broth
Once your epic simmer is complete, it's time to prepare your broth for storage and enjoy its myriad uses.
1. **Cooling:** Remove the pot from the heat and allow it to cool partially. You can carefully remove the bones and discard them, scraping off any clinging marrow for extra deliciousness if you wish.
2. **Straining:** Using a fine-mesh sieve, strain the broth into large heat-proof containers. For an even clearer broth, you can line the sieve with cheesecloth.
3. **Defatting (Optional):** As the broth cools further, a layer of fat will solidify on top. You can easily skim this off and discard it, or save it for cooking. This solid fat acts as a natural seal, helping to preserve the broth.
4. **Storage:**
*
Refrigerator: Store in airtight containers for up to 5-7 days.
*
Freezer: For longer storage, pour the cooled broth into freezer-safe containers, leaving some headspace for expansion. Ice cube trays are excellent for freezing small portions, perfect for adding to sauces or quickly thawing for a single serving. Frozen broth can last for several months.
Creative Uses for Your Golden Elixir
Now that you know how to make beef broth stock, the possibilities are endless!
*
Sipping: A warm mug of beef broth is incredibly comforting and nourishing on its own, especially during colder months or when feeling under the weather.
*
Soups & Stews: This is its most classic use, providing an unparalleled depth of flavor to any soup, stew, or chili.
*
Sauces & Gravies: Use it as the base for rich gravies and pan sauces, adding a gourmet touch to your meals.
*
Cooking Grains: Cook rice, quinoa, or other grains in beef broth instead of water for an extra layer of flavor and nutrients.
*
Braising: It's the perfect liquid for braising meats and vegetables.
Homemade beef broth is a culinary powerhouse, boosting the flavor profile of countless dishes while simultaneously delivering vital nutrients like collagen, amino acids, and essential minerals. For more in-depth recipes and to further understand the health benefits, consider reading
Boost Health with Beef Broth: Collagen & Mineral-Rich Recipe.
Making your own beef broth is a testament to mindful eating and a step towards a healthier lifestyle. It’s a process that, once mastered, will transform your cooking and provide a foundation for truly wholesome meals. The effort is minimal compared to the incredible rewards of flavor, nutrition, and satisfaction you'll gain from this humble, yet mighty, kitchen staple. So, gather your bones, embrace the simmer, and get ready to enjoy the unparalleled goodness of homemade beef broth.